
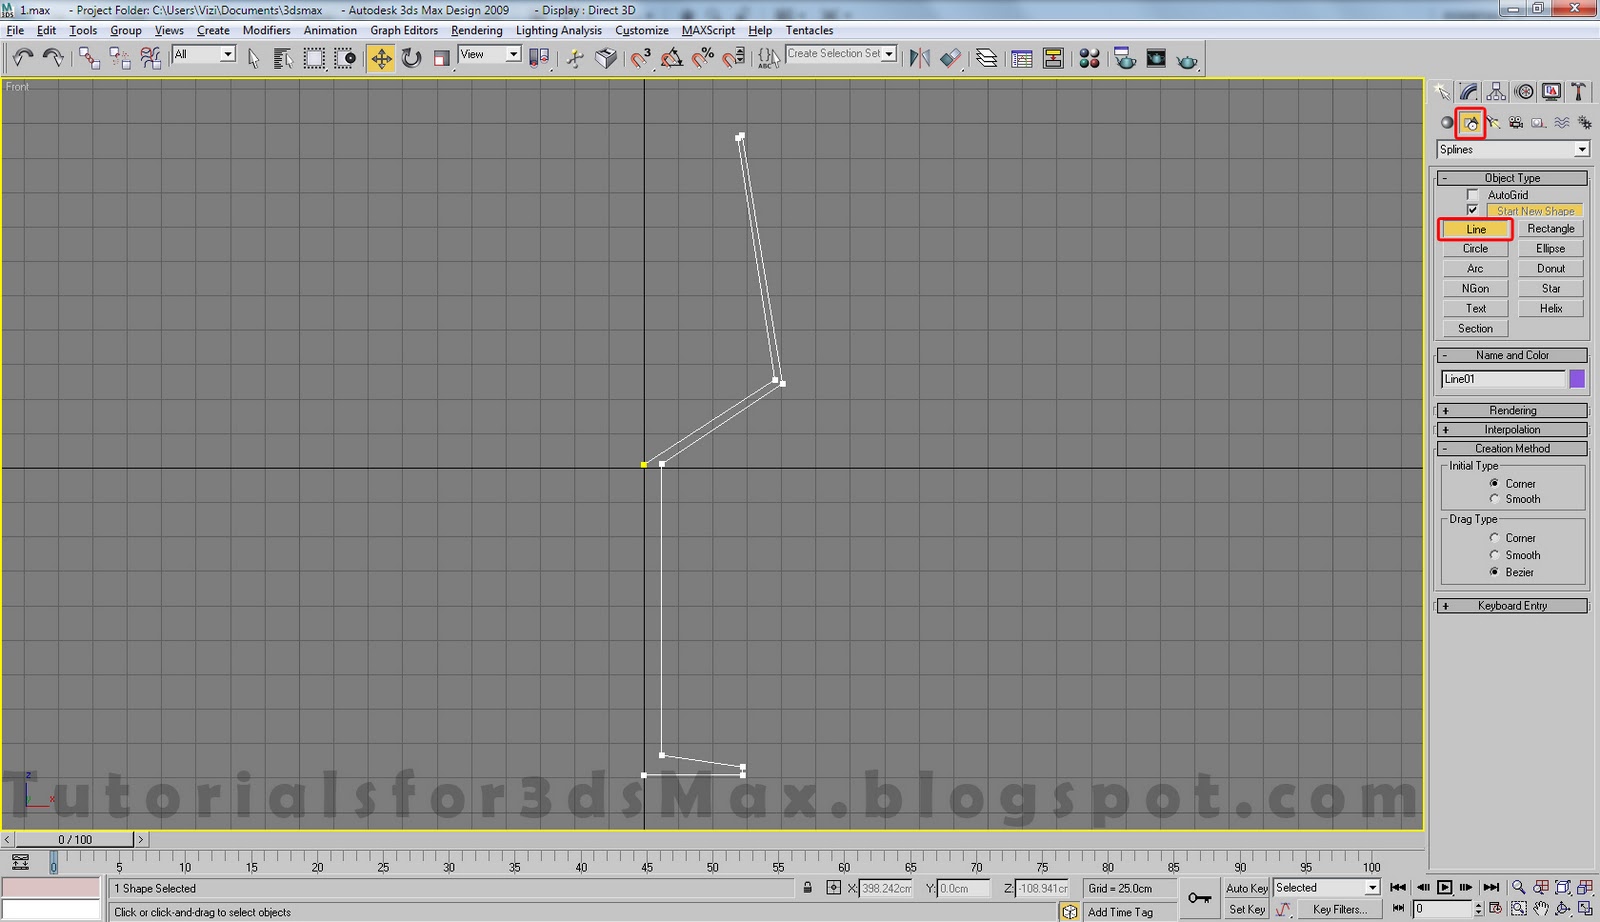
Step 1: To create the cup's body go to Shapes category and select the line tool. Now, in the front viewport(F on you keyboard) start drawing, left click on the screen to start the line, continue until you get something like in the below image, right click to end the line.
Hint: if the handle are stuck in one direction, press F8 to unlock them.

Step 3: You need to apply Fillet to 5 of our vertices(see image below). To do this select a vertex, click on Fillet and click and drag over the vertex you need to apply Fillet or simply enter the amount you want in the box next to Fillet. You can see that the top two vertices are really close together so you need to enter a very small amount because we need a nice, smooth edge. Play around until you get something like in the below image.

Step 4: With the line selected apply a Lathe modifier from the Modifier List, don't worry about the outcome, we'll fix that in the next step.

Step 5: With the Lathe modifier selected check the "Weld Core" box set the Segments to 48 and click on Min under the Align section. Done.

Thanks for reading this tutorial.


0 comments:
Post a Comment