
Step 1: To start this 3d Modeling lesson simply Open or Reset Max. Then from Create>Geometry create a Cylinder in Top view with a Radius of 20cm and a Height of 15cm. Set the Height Segments to 2, Cap Segments to 1 and Sides to 18.

Step 2: Select the Select and Move tool and at the bottom of the screen change the X,Y,Z amounts to 0 to move our cylinder to the center of the grid. Now to convert our selection right click on the screen Covert to>Convert to Editable Poly.

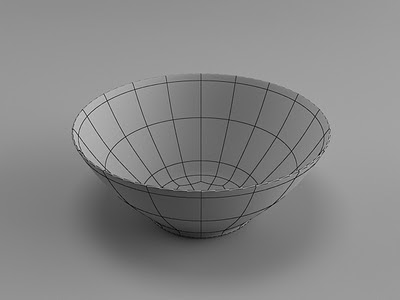
Step 3: From Command Panel select Modify and from Selection rollout menu click on Polygon(shortcut key "4"). Select the Top polygon and press Delete on you keyboard to Delete it.

Step 4: Change your Selection mode to Vertex, select all the bottom vertices and using the Select and Uniform Scale tool scale the selection down.

Step 5: Scale the middle vertices to.

Step 6: Change the Selection mode to Polygon and select the bottom one. Click on the little box next to Extrude and Extrude it with an amount of 1cm. Click the Check mark for OK.

Step 7: Click the box next to Inset to inset the extruded polygon with an amount of 1cm.

Step 8: Inset the same polygon again only this time with an amount of 7cm.

Step 9: Holding down CTRL click on Vertex in Selection rollout menu to convert your selection from polygon to vertex.

Step 10: From Edit Vertices rollout menu click on the box next to Weld, set the amount to 3cm and click OK. You now have only 1 vertex left.

Step 11: Change your selection mode to Edge(shortcut key "2") and select every other edge like i've did below holding down CTRL to select multiple. Press Backspace to Remove them.

Step 12: The next thing to do in this 3d modeling tutorial is to add some thickness, so from the Modifier List select Shell modifier, change the Outer Amount to 0.4cm and Convert the Bowl to Editable Poly again. Right click on the screen, Convert to> Convert to Editable Poly.

Step 13: In Edge selection mode select two from the top edges and click on Loop to make a loop selection.

Step 14: Chamfer the edges from Edit Edges with an amount of 0.1cm and 1 segment.

Step 15: Make a loop selection to select the edges i've selected below.

Step 16: Chamfer them with an amount of 0.4cm and 1 segment.

Step 17: Go to the interior of the bowl, select the center vertex and convert the selection to polygon by holding down CTRL an click on the Polygon in selection rollout menu.

Step 18: Inset the polygons resulted from converting the selection with an amount of 2.5cm.

Step 19: In edge mode make a loop selection like i've did below. Hold down CTRL and press Backspace to remove the edges and also the vertices.

Step 20: From the final step of our 3d Modeling example simply add from the Modifier List a Turbo Smooth modifier and change the number of Iterations to 2.

As always, if you have some problems following this 3d modeling tutorial feel free to comment. I'll answer as soon as i can. Regards!


0 comments:
Post a Comment