

Step 2: To convert our Hedra to Editable Poly right click on it and Convert to > Convert to Editable Poly.

Step 3a: It's now time to Detach all the polygons individually. We have to ways of doing this. The first one is to go in the Modify tab, select the Edge selection mode, press CTRL+A to select all edges and in Edit Edges rollout menu click on Split.

Step 3b: If you chose the first option(witch i recommend) you can skip the next 3 steps.
For the second option go in the Modify tab select the Polygon selection mode, select one polygon, in Edit Geometry rollout menu click on Detach, check the box for Detach to Element and click OK. Now to keep track of what polygons we've detached just click on Hide Selection. Doing this we will know exactly how many polygons we have to Detach.
You must do the exact same thing for 32 Polygons. This will take some time.

Step 4: Half way there. Recap: Select, Detach to Element, Hide!

Step 5: When you have only one polygons left click on Unhide All.

Step 6: Will we'll stop for a little while with our 3d modeling tutorial because in the next steps we will apply the texture. It's much easier to do this now then later. For now just Exit selection mode. To do this simply select Editable Poly.

Step 7: From the Modifier list apply a Unwrap UVW modifier.

Step 8: From Unwrap UVW modifier click on "Edit...".

Step 9: Now click the plus sign next to Unwrap UVW modifier to expand it. Select Face and press CTRL+A on your keyboard to select them all. Check the box for Select By Element. In Edit UVW's window using the Move tool move the selection to the center of the square you can see outlined.
Note: You can use Pan and scroll button to zoom to navigate in the Edit UVW's window.

Step 10: In Edit UVW's window click on Mapping and select Flatten Mapping, in the Flatten Mapping pop-up window click OK.

Step 11: In Edit UVW's window click on CheckerPattern (Checker) and select Pick Texture. In the pop-up windows select Bitmap and from there select this TEXTURE(click to Open).
Note: I've already created the texture because i don't want to go in Photoshop with you guys. But if you want to make something different like a classic ball in white and black simply go to Tools > Render UVW, change the Width and Height to 2048, click Render UV Template, Save the UVW and using Photoshop open the saved UVW map and paint on top of it as you like.

Step 12: Press "M" to open the Material Editor or select it from the main tool bar. Select the first Standard material(if you want you can use VRayMtl) and click the box next to Diffuse, select Bitmap and again open the texture we've used in step 11.

Step 13: First click on Show Standard Map in Viewport and after that click on Assign Material to Selection. Press "M" to close the Material Editor.
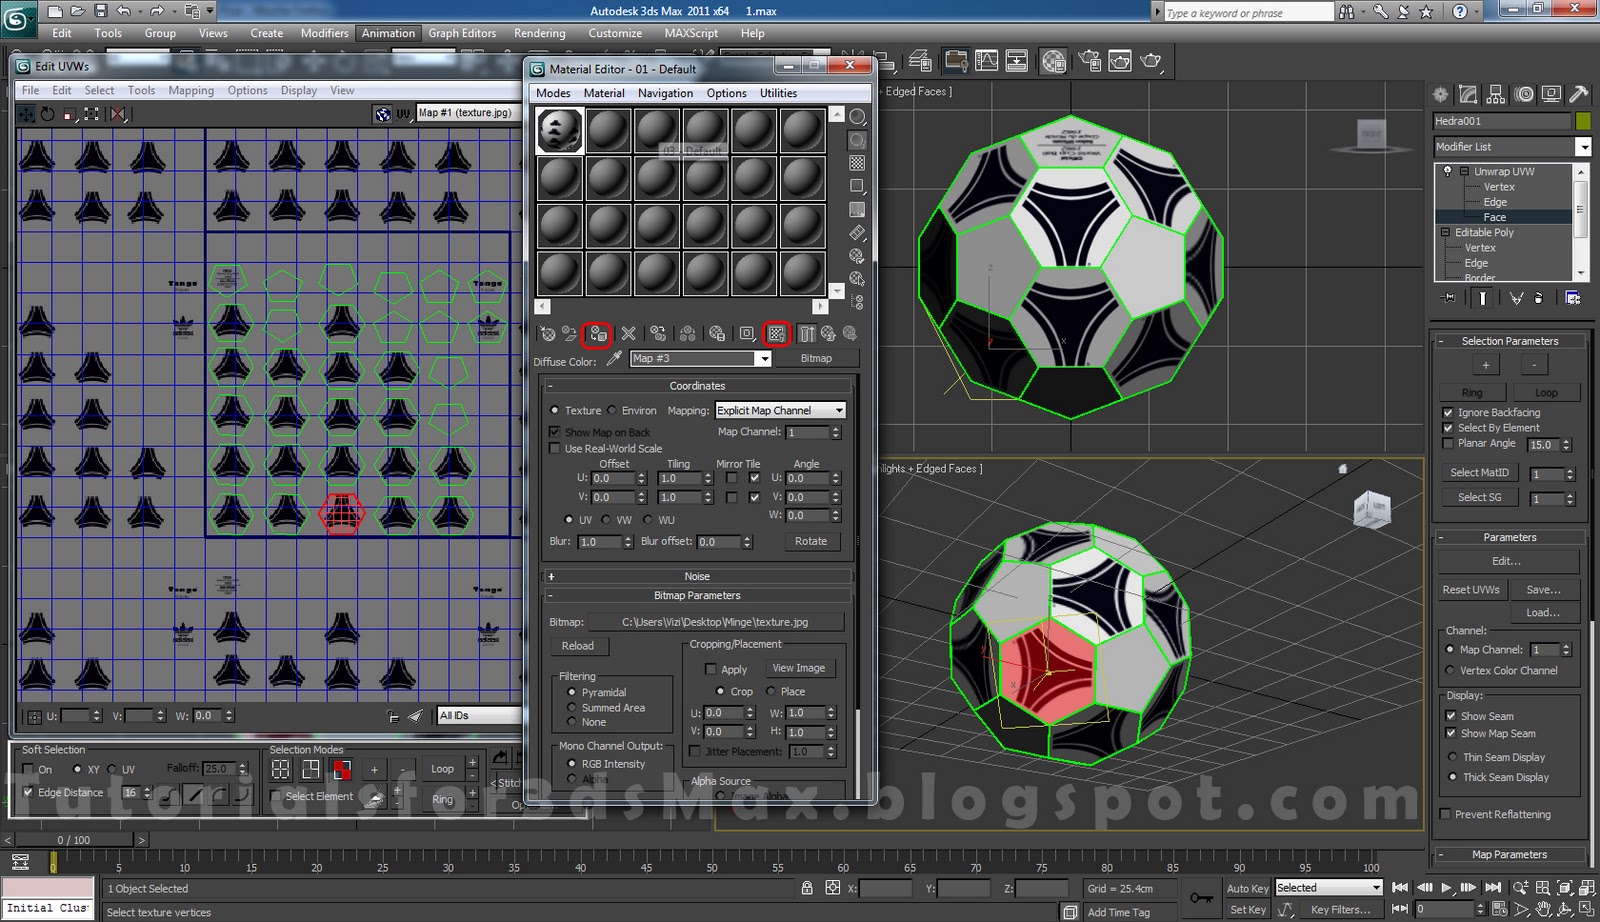
Step 14: As you can see the texture in not quite matching up. It's time for some tweaking now. But first let me show you what I'm talking about. As you can see below from 5 faces forming a circle only the selected one dose not match with the others. So to fix this simply select it by clicking on it in the viewport, go in Edit UVW's window and Using the Mirror or Rotate tool rotate(180�) the face until she fits with the rest of them.

Step 15: Do the same thing for all the faces until all of them match up. Also rotate the logos to fit OK.

Step 16: After all the faces are aligned correctly make sure they also fit. To do this select the Move tool in the Edit UVW's window and move all the faces that dose not fit like the one you can see below.

Step 17: We are finish with this step. Cloe the Edit UVW and let's get back to our 3d modeling tutorial.

Step 18: Continuing with our 3d modeling tutorial add a MeshSmooth modifier form the Modifier list and change the Iterations to 3.

Step 19: Add a Spherify modifier.

Step 20: Add a Edit Poly modifier.

Step 21: Select Polygon selection mode from the Edit Poly modifier and press CTRL+A to select all polygons. Click on the little box next to Extrude in Edit Polygons rollout menu, leave the extrusion type as Group Normals and change the amount to 0.75cm, click the check mark for OK.

Step 22: Exit selection mode and add another Meshsmooth modifier, only this time leave the Iterations to 1 and change the Subdivision Method to Quad Output.

Step 23: Open Material Editor, press "M" or select it from the main toolbar, select our material, change the Specular level to 50 and the Glossiness to 30, in Maps check the box for Bump and change the amount to 2. Click on None next to Bump, select Bitmap and Open this Noise Texture(click to open).

Step 24: Change the Tiling to 2 and press F9 to render(or select it from the main toolbar). You can see our bump map's effect on the ball.

Step 25: That's it. We are finished with this 3d modeling tutorial.

After you are finished with this 3d modeling tutorial you can use one of the following rendering tutorials "Studio Setup with 3ds Max and VRay" or "Mp3 Player Materials, Lights and Rendering tutorial" to get similar results such as the one bellow:
As usual don't hesitate to comment if you have any problems following this 3d modeling tutorial.


1 comments:
Post a Comment